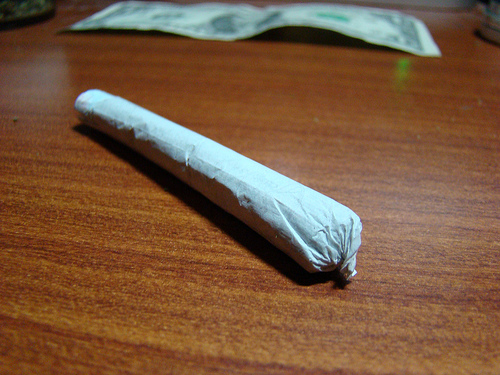
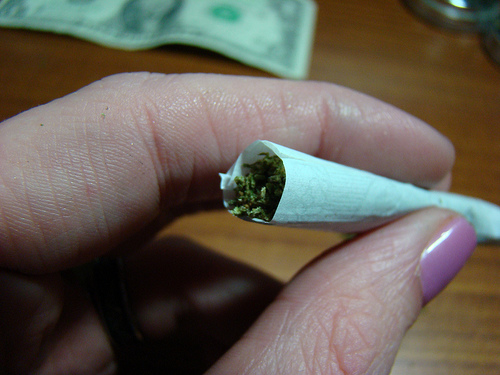
Whether a spliff, a left-handed-cigarette, a twig, or something you’ve come up with all on your own, there comes a kind of smug satisfaction in rolling a joint you can truly be proud of. A kind of joint you can pass, easy minded, to the next in your rotation. A perfect joint.
Implements
When it comes to the purchase of marijuana, names like Kush, Purple Haze, AK-47, and the like will almost always be tossed around. In fact, there’s such an array of titles out there it’s almost dizzying. My advice: don’t even worry about it. Chances are, unless you’ve had the fortune of tapping an honest source (which is unlikely), or you’ve purchased seeds or clones from a reliable dealer and reared the plants yourself, you’re getting weed, plain and simple.
Sure what you’ve bought had a proper name somewhere along the line, and it could even be that that’s the name you were given when you bought it, but most likely, by the time your gram is changed hand over hand and has arrived in your palm, seller after seller has cooled it up so buyer after buyer thinks they’re getting some rare and exotic strain.
A good pair of scissors is a must, and if you’re a regular roller, a designated pair is what I recommend. Marijuana is a resinous substance and with repeated use you’ll notice a gooey green build-up along the leading edge of your snips. This is basically ignored in certain circles (they just wont care) but explain what that stuff is to Nan or your aunt Matilda who sometimes comes over to give your hair a trimming. Best to avoid a sticky situation … buy a second pair.
Because what wraps our weed is basically the foundation for any joint (well crafted or otherwise), paper selection is important, and since paper’s never gotten anyone high – in my opinion – thinner is better.
The Perfect Joint
Take a shank of your weed from your baggy. If your guy’s good, you should be able to get four decent sized joints from one gram. If your guy isn’t good, get a new guy. Don’t let your self get ripped-off. If you’re a smoker (I am), you wouldn’t buy three quarters of a pack of smokes … and even if you did, you wouldn’t pay full price.
Since you know you can get four joints per gram, you can judge about a quarter-gram and you’ll be good to role. Pull off that quarter-chunk, hold it between your thumb and index finger, hold your scissors at a counter angle, and snip threw your bud. Do this step five or six times, constantly rolling your nugget over so that your scissors cut threw a new cross section. Then drop your weed onto your rolling surface. The pile you’ve created should have a sorta chunky appearance at this time.
My personal experience dictates I’ll reach for a little tobacco to mix with my dope, whereas, if the person or people who got you involved didn’t mix, you might just say fine is fine. If that’s the case, ignore me grabbing the tobacco I’m reaching for, and give your weed a little more attention with the scissors. Keep in mind: marijuana’s a resinous substance, and resin melts; it doesn’t burn. Excessive cutting helps fluff, and fluffy weed burns better.
Add slightly less than an equal amount of tobacco to the weed you’ve prepared, pinch a wad of the two ingredients between your thumb and index finger, and repeat the cutting process. In the end your weed should be a brown-green fluff mixture. This fluff will, of course, vary from gram to gram with the differing of moisture levels, but, over all, that won’t mean too much: the tobacco is in there, and it is the tobacco which will ensure a good burn.
Pull a paper from your pack now, and, making sure the lick’em-stick’em strip is directed toward your licker, hold the crease so that it makes a V-channel along the bottom edge. Weather you’re a lefty or a righty, you’ll need your business hand free to load with, so your paper will have to be held with one hand for now. I happen to be a righty, so I’ll be explaining how to do this from my perspective; if you’re a lefty, however, simply reverse my directions.
Hold your right hand horizontal, palm facing up, and fold your pinkie and ring finger in (you won’t be needing them). Lay the paper so about a quarter inch of the sharp edge of the crease lies in the natural crease between your index and middle fingers. Bring your thumb around so that it covers that first quarter inch, and pinch. Your thumb in this placement not only acts as the holder of your paper, but also as a stop so none of your mixture dribbles from that end. Always, Always, Always role over a flat, smooth, surface if you can help it; dribbles are inevitable and picking up crumbs is easiest from a flat surface.
Tilt the opened end of your paper slightly upwards to prevent spill-off from that end, pinch as much of your mixture up with the fingers of your free hand as you can, and sprinkle it along the paper’s crease. Try and make it so that your mixture lies as evenly as possibly, buts up against your thumb on one end, and comes to about the same distance from the other. With the index finger of your opposite hand, lightly tamp it along the length of the joint.
Keeping the paper as level as possible now, using the thumbs and index fingers of both hands, fold the paper over onto itself, pinch the contents within, and role the paper back and forth a few times. This will turn the fluffy contents into a rudimentary joint-shape. Surprisingly, without the aid of the paper, it will keep this delicate profile.
Probably the most difficult part of twisting off a decent joint: role the contents back toward you until majority of the glue-edge side of the paper hangs into free air. Slowly turn your joint forward again making sure that, instead of the paper sliding past itself, it curls in under. There’s no need for a perfect fold along here; this will be the interior of your joint, and I assure you: it will burn weather there’s a pretty crease in there, or not.
More important than anything (including weed dribbling from the opened ends of your joint): try and keep your mixture on an even keel. Let it all bunch in one end and you’ll have a joint that resembles a baseball bat; allow it bunch in the middle, and you’ll have a porker-joint. It’s a learned skill, there’s lot of trying to escape your control at this point, and it will take practice to get good. Don’t get discouraged.
Once your crease is folded under, you’ve pretty much won. Continue to role the joint out until the glue-edge is about to lay flat, then lick and stick.
Sandwich one end of the paper with your thumb and index finger, now, so that you can tilt your joint vertical without crumbs falling out. Take the tip of your scissors, stick them down into the up-turned opened end, and tamp down the contents. At this point you can either dribble any off-falls left on your rolling table back down into the sleeve of your joint, or you can stuff ‘em back into your baggy for your next role. Whichever the case, once you’ve finished tamping, you’re done with that end. Twist it shut (make the fuse).
Flip your joint. Use your scissors to re-open that end, and repeat the tamping process – only this time the end will need to be left open to accommodate a barrel. What’s a barrel? The barrel is a slip of curled cardboard which, when inserted, acts as both a stiffener of the paper shroud, and a tube in which to draw threw.
Judge how far down inside your joint before you hit firm weed. This depth will be the width you’ll need to cut. The cardboard sheath papers come packaged in is just about perfect for this. Cut a strip using your judgement as a guide. The length you’ll need depends on the thickness of your joint. If you’ve rolled a fatty, you’ll need a slightly longer strip, if you rolled a pinner, you can choke back a bit on the lenth. Regardless the size of your joint, your barrel should circle the inside circumference only two or three times, and should only stand to strengthen the paper that already exist there. Too much and your in the realm of filter – and filter’s a no-no in the land of reefe.
Give your new creation a few taps (filter down) to set the barrel and knock out any loose bits, and that’s it. If you desire to test the quality of your new creation, stand it on its end. Without outside interference, a finely crafted joint should stand – unaided – on its barrel for as long as you can bear to leave it there.


