Do you wish you could replace a light fixture with a ceiling fan, or maybe take down that old broken ceiling fan and replace it with a newer, quieter model?
Well, you can! You don’t need a man in the house to replace a ceiling fan. You might need the help of a friend, but you might be able to do it yourself if you’re strong enough to lift 50 pounds. As far as home improvement projects go, hooking up a ceiling fan is pretty easy. It doesn’t require any technical skill, and it only takes a couple of hours. Here’s how it’s done.
Turn Off Power to the Fan Circuit
Go to your circuit breaker box and turn off the circuit your fan is on. If you’re lucky, some previous homeowner has left labels like “master bedroom” and “kitchen” next to the relevant circuit breakers. If not, and you’re not sure which breaker switches control which circuits, you will have to do some investigating to figure it out. Once you have turned off the power to the circuit at the breaker box, take a voltage tester and make sure that the power is really out in that room.
Take Down the Old Fixture
Most light fixtures are fairly easy to take down. You just have to remove the glass globe or shade to expose the screws that hold the fixture in place. Unscrew them and pull the light fixture down. Remove the wire nuts and unroll the wiring connections.
Old fans are a little bit harder to take down. You will need to remove the light bulbs and globes, light kit, and blade from the fan motor, and only then can you unscrew the screws holding the canopy in place and disconnect the downrod from the mounting bracket. Don’t forget to take down the mounting bracket, too.
Put Up a Fan Brace
If you already have a ceiling fan in that spot, you probably don’t need to put up a fan brace – but make sure there is one. The fan should be anchored directly into a ceiling joist, into a two-by-four anchored between two joists with 1.5-inch screws, or into an expanding metal fan brace. If you need to put a fan brace in the ceiling, you can either go up in the attic and install a two-by-four between the joists, or you can use one of the expanding braces that you can insert through the ceiling hole from below.
Install a New Electrical Junction Box
Again, if you are replacing an existing ceiling fan, you might already have a fan-rated electrical box in your ceiling. Check to make sure. You should be using a fan-rated electrical junction box and it should be anchored to your fan brace. Replace your junction box if necessary.
Secure the Mounting Bracket
Here’s where it’s time to bust out the instructions that came with your fan. You will need to fasten the mounting bracket that came with your fan to the electrical junction box and brace in your ceiling. Follow your fan’s instructions to attach your mounting bracket to the electrical box, and pull the wires from your house down through the mounting bracket.
Put Together the Fan Body
You’ll also need to refer to your instructions to assemble the fan motor, downrod, and canopy. The downrod should attach to the top of the fan motor using cotter pins and clevis pins. You should pull the wires from the fan motor up through the downrod. Attach the canopy to the downrod.
Connect the Wiring
There should be a hook somewhere on the fan mounting bracket so that you can hang the fan motor while you’re connecting the wiring. Connect each of the wires to their matching corresponding wires. So, the white wire should connect to the white wire, the black wire to the black wire, and the green or bare wire to the green or bare wire. Twist the exposed ends of the wires together and use wire nuts to secure the connections.
Add the Lights
You might need to connect wiring for the lights, too, and if so, you do it the same way you connected the wiring for the fan motor. Some light kits just plug in, though. Attach the light kit to the fan motor, and add light bulbs and shades.
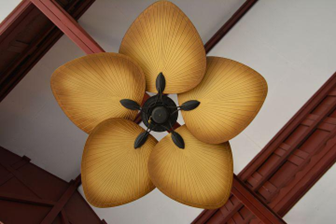
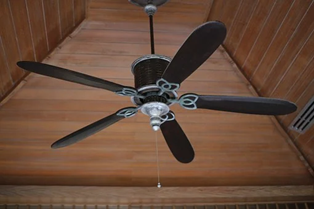
Put on the Fan Blades
You’ll need to put the blade irons on the fan blades, then you can attach the blades to the fan motor.
Once you have your blades and light kit in place, you can turn the power back on and put your new fan to the test.


