Remote working is certainly the business trend of 2020. Thanks to the global pandemic, millions of workers across the world have been forced to set up an office in their homes.
Whilst difficult for many businesses and employees initially; a number of companies have reported that the ‘remote working experiment’ that has been thrust upon us by COVID-19, has answered many questions about working from home – with some very positive answers.
For example, Twitter has announced that it will allow a large percentage of its employees to work from home for the foreseeable future. Tech giants Google and Facebook have followed suit, at least to some degree with a proverbial embrace of remote working going forwards. Whilst the option to work from home is a great bonus for many workers who will want to avoid a long commute or just prefer working surrounded by home comforts, it is also in the interest of their employers, as the majority of reports have shown an increased level of productivity. One study, for example, reported that remote workers actually work more hours per day, the equivalent of an extra 1.4 days per month.
Build a Productive Home Office with the Right Tools
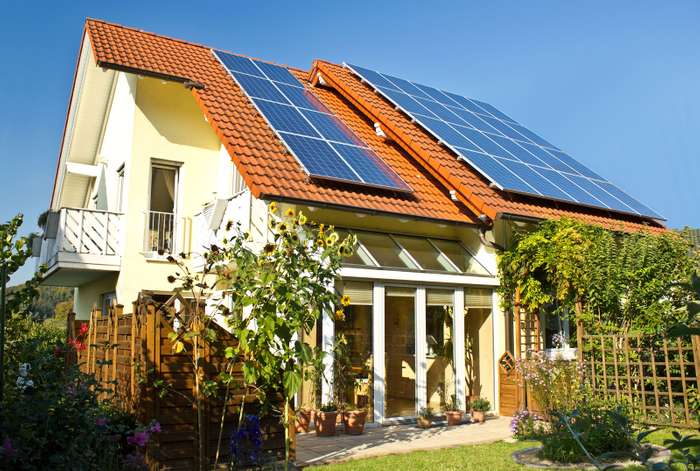
If you are looking to invest in a home office to make the most of a permanent shift to remote working, then it may be financially wise and ethically sound to create an office that is powered by renewable energy. One of the few downsides of working from home, is the potential increase in utility bills, especially as we approach winter.
One additional tip for business-owners considering transitioning to a home office is to invest or install some specific Chrome extensions and mobile phone apps. Project management tools such as Trello, and communication tools such as Microsoft Teams are essential if you are remote working and in charge of employees or a team. Moneypenny’s virtual receptionist service is a perfect alternative to an in-house receptionist too.
By creating a home office that uses renewable energy and investing in specialised remote-working tools, you can reap the benefits of extremely low overheads and increased productivity.
Home Office Design Tips
Remember that if you are working from home exclusively, you will likely be spending 40 hours or more per week, in your office. With this in mind, it can be a good idea to pay some attention to the interior of the office.
Plants can be a great addition to any office, they improve the air quality and the presence of plants has been shown in many studies to improve mood and wellbeing.
Negative ions are very positive, they can help reduce inflammation and reduce the symptoms of allergies. One study concluded that:
“Reports also showed that NAIs (negative ions) could help people in relieving symptoms of allergies to dust, mold spores, and other allergens”.
To take your office wellbeing to the next level, consider adding some kind of source of negative ions. Himalayan salt lamps, grounding mats and humidifiers may all produce negative ions.
Your posture is also vitally important when it comes to your home office workstation setup. So it would be considered wise to invest in a sturdy office chair and desk. Consider using a stability ball to improve your posture and core strength and/or invest in a standing desk.
The color of your home office can also impact your mood. So check out this guide if you are going to do a spot of painting or wallpapering.
How to Setup Solar Power
Always get any electrical work checked by a professional before turning the power on. To mitigate risk further, consider hiring a professional.
Now for some technical, step by step instructions.
In this example, we will go through the process of setting up a Renogy 100w starter kit, which retails for around $200. The kit comes with solar panels, a charge controller and all the necessary wires that are required for the complete setup. Whilst you can attach the solar panel via the charge controller to a device, ideally, you would want to charge a battery, which can then be attached to multiple devices in your home office. A sealed lead acid solar battery is ideal, the VMAX batteries are recommended by solar panel YouTuber Will Prowse. Finally, you will also require an inverter, the inverter will power your appliances – you can plug them into the inverter the same way you would plug them into your typical home outlet. The total cost of the system is around $650-$850.
Mounting the Solar Panel
The best way to mount and attach your solar panel is with the mounting brackets that are supplied in the Renogy kit. Use the bolt, washers and locking nut supplied. You will need a wrench to tighten them up.
Once the mounting brackets are in place, use the included screws, to mount the panels on a roof or wherever you want to place the panels.
Connect the Charge Controller to the Battery
The two wires on the back of the solar panel, need to connect to the charge controller – but be sure that the charge controller is connected to the battery before connecting them.
Ideally, you will want to mount the charge controller to some kind of platform, such as a piece of wood. Just make sure that wherever the charge controller is mounted, you can place the battery very close to it.
Once the charge controller is mounted, you will need the wires/leads that connect the battery to the controller. Rip off the insulation, to expose the end of the cable.
On the charge controller, look for the battery icon with the positive (+) and negative (-) symbols. With a flat-headed screwdriver, unscrew the screw inside the negative outlet. Insert the wire below the negative outlet and then screw it down: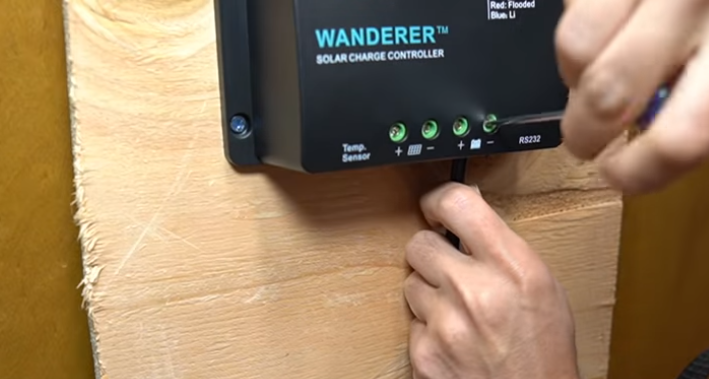
Take the opposite end of the wire that you have just connected to the charge controller and attach it to the battery’s negative terminal. The negative terminal will either show the negative symbol (-) or it will be black. Once it is connected, tighten it down with a wrench.
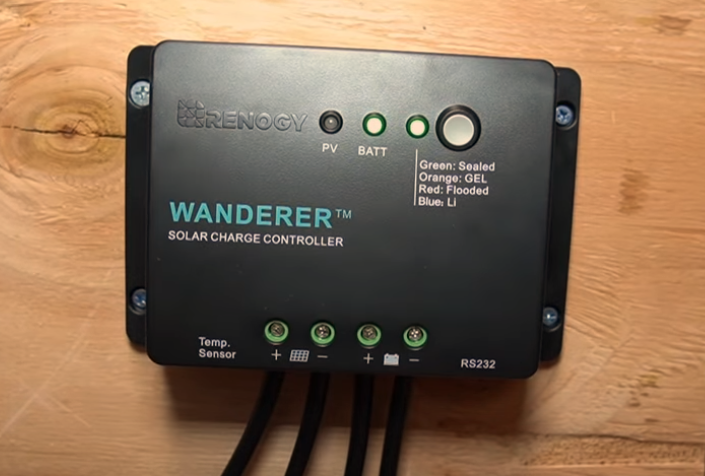
Repeat this process with the remaining wire, connecting the positive outlet of the charge controller, to the positive terminal on the battery. The charge controller should now light up.
Connect the Solar Panel to the Charge Controller
The solar panel will have two wires attached to it. The one with the red ring at the end of the outlet is the positive, the one which is completely black is the negative
The negative should be attached first. Attach one of the supplied wires to the negative outlet, and then attach the wire to the charge controller’s remaining negative outlet, which should be shown with a negative symbol next to a solar panel icon.
The positive wire then needs to connect to the remaining wire and plugged into the positive outlet on the charge controller – which should be shown with a positive symbol (+) next to a solar panel icon.
The wires will insert underneath the charge controller, much like the wires from the battery did.
Getting the Battery to Power Your Appliances
To attach the battery to an appliance, you will have to remove one of the solar panel cables from the charge controller.
Remote the positive terminal from the charge controller and the battery.
You will need 2 gauge battery hook-up cables to connect the charge controller to the inverter that can then be used directly with appliances. The completely black cable is usually the negative and the one with red on it, is the positive cable.
It can be a good idea to buy a bolt-on fuse – 175 amp.
Connect the positive cable to the inverter and screw it on and then the negative. The positive cable will attach to a red terminal on the inverter and the negative one to a black or metal colored terminal.
Now connect the negative wire from the inverter to the negative terminal on the battery.
Next, connect the positive cable to the positive terminal on the battery – there will be a spark!
Now you can reconnect the solar panel cable to the charge controller. To check the inverter is working, turn on the inverter and connect it to an appliance.
And, finally, that’s it!
Be aware, however, that if you run the battery down to zero power, it can damage it. With this in mind, it can be a good idea to by a battery capacity monitor.


