Long hair that looks healthy and shiny is obviously something a lot of women want. There are tons of long hair styles for every face shape and any occasion but sometimes, the best styles are the ones that are the most simple to do. Fishtail braids are quickly becoming the next big thing in long hair styles and they’re surprisingly easy to do. If you want to know how to do a fishtail braid, read on. I’ll take you through the process step by step and offer a few ideas for making the braid a little more versatile.
bebexo has made excellent tutorial ..
Why Fishtail Braids are Appealing
This braid is so appealing because it sit tightly against the head, allowing for a softer more elegant looking style. It’s casual but also classy, working with a pair of jeans and a t-shirt or a nice dress for a formal event. It’s also incredibly easy to put in and takes little upkeep. You can do it before you leave and it will still look lovely by the end of the evening. In addition, it’s a gentler braid on your hair. Tight braids can cause hair to break. That’s something you obviously want to avoid.

How to Do a Fishtail Braid
As I mentioned, doing a fishtail braid is extremely easy once you get the hang of it but it can be a little complicated the first few times you try. Follow this step by step guide to get the basics down and then just keep practicing until you perfect the method. It’s well worth the time if you have long hair and want to experiment with fun, new long hair styles.
Step One: Brush or comb your hair to make sure there are no tangles to contend with as you braid.
Step Two: Pull your hair into a loose pony tail. Secure the pony tail with an ouchless elastic (elastics without the metal clip as they can damage hair)
Step Three: Separate hair into two even chunks. Make sure you have the same amount of hair in each chunk.
Step Four: Hold the chunk of hair on the right in your right hand, making sure you’ve gathered all of the hair that belongs with that chunk. You can also start on the left if you’re more comfortable that way. Simply adjust these instructions to meet your needs.
Step Five: Using your left hand, separate a small section of hair from the outside of the chunk on the left. This should be from the part of the chunk closest to your left ear. The section should be about one eighth the size of the total chunk. Again, make sure you keep the section as even as possible and gather all the hair that you need with that section. This makes for a cleaner looking braid.
Step Six: Place the smaller section of hair over the larger chunk and add it to the hair in the right chunk. Make you sure you add the hair from the outside of the left chunk to the inside of the right chunk (the part of the right chunk closest to your left ear).
Step Seven: Hold the left chunk of hair in your left hand. Follow the same procedure you used in steps five and six but with the right chunk of hair instead of the left. Make sure the smaller section you choose from the right chunk is from the outside of the chunk (closest to the right ear) and you move it to the inside of the left chunk (closest to the left ear)
Step Eight: Continue switching hands and repeat steps five and six until your braid is the length you want it.
Step Nine: Secure your braid with an ouchless elastic to hold it in place.
Tips: Because you’re going for something a little more relaxed and casual, you don’t want to start the braid at the top of your head like you would with many of the other types of braids out there and you don’t want to pull it tight against your head. Instead, you want to start it lower on your head. Imagine a line traveling around the back of your head from the top of one ear to the top of the other. Imagine another line from one ear lobe to the other ear lobe. Start the braid between those two imaginary lines. You also want to leave the hair above the braid a bit loose and whispy instead of pulling the braid right to the root of the hair.
Dressing Up a Fishtail Braid
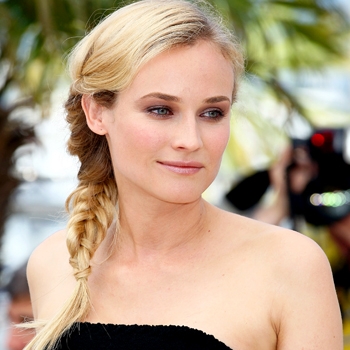
There are lots of little things you can do to make the fishtail braid more interesting. Try starting the braid more to the side of your head and allowing it to hang loosely over your shoulder. This is a fun and casual style that works for just about any occasion. Choose a beaded elastic or hair tie over the elastic at the bottom to dress it up a little bit more. In the photo above, Diane Kruger has taken the basic fishtail braid and made it look elegant but sweet.

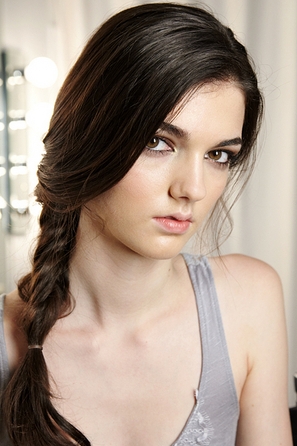
The messy braid is a great look for more casual occasions. While the braid Zoë Saldana is wearing in the above picture isn’t a fishtail braid, this look can easily be pulled off with a fishtail braid especially if you have bangs or a layered hairstyle. Allow the shorter hair to remain loose, falling in your face. It’s an especially great look if you want to call more attention to your eyes and lips.

The peek-a-boo braid is a great option and looks especially lovely with a fishtail braid. To get this look, choose a section of your hair underneath that you’d like braid and pull the rest of your hair back into a tight ponytail. Braid your hair as you would if you were doing all of your hair and them let the rest of your hair out of the ponytail. This can work for a more casual look or an elegant look depending on how you choose to style the rest of your hair. Aubrey O’Day’s look in the above photo could really work for either.
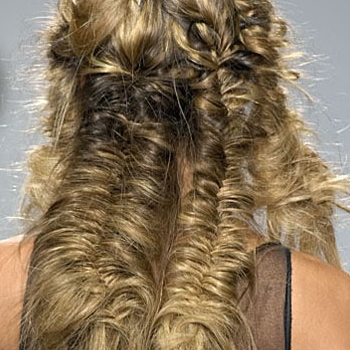
While I’m not a huge fan of the style in the above photo I was unable to really find a better example of multiple fishtail braids. With that said, multiple braids is a great option. You can either go for the look above which would be great for a night out on the town or an event with a more funky feel or you can go for something a little more refined. To get the look above, simply separate your hair into several separate chunks when you begin and secure them with a loose ponytail so they don’t get mixed up. Do a fishtail braid for each ponytail and then remove the elastics. Pretty simple. You can also choose a more elegant look by doing a separate fishtail braid on the right and left sides of your head.


