 source: Amazon.con
So you want to know how to cut bangs. To be honest, it’s something I’ve done for years – since my early teens for sure – and I’m not really sure why it’s so frowned upon. It’s really not all that difficult to do and it saves you what can wind up being a fairly expensive trip to the salon. Because I know this is something a lot of women out there are interested in, I’ve put together this little guide to walk you through the whole process step by step. First, a few words of warning:
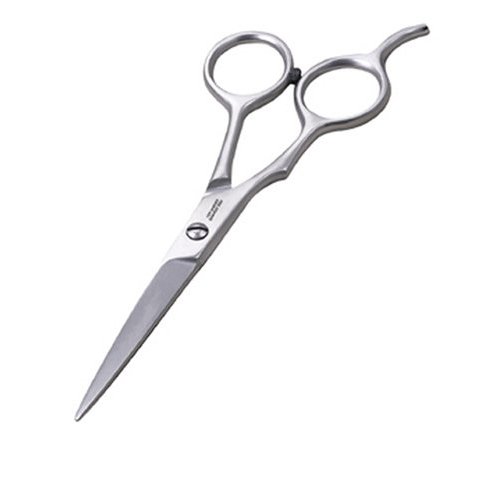
- Use the right tools! Don’t use safety scissors, cuticle scissors or worn down scissors to cut your hair – especially your bangs. Most people recommend using haircutting shears which are ideal but if you don’t happen to have any, at least make sure the scissors you use have sharp blades what will cut cleanly. If you decide to go the shears route, I suggest checking out these shears from Amazon.com. Fairly inexpensive and high quality although you can likely get something at your local hair salon (probably not for quite as cheap but at least in the ballpark) if you’re not sure about shopping online.
- Choose the right location! You need to have decent light if you don’t want to make a complete mess out of your bangs. While being in front of a mirror is an obvious first step, you need to make sure you have adequate light at the mirror. Stand in front of the mirror and put your arms up. If you can still see yourself clearly and with plenty of light, you should be fine. If you find the room is a little dark, take any shades off overhead lamps.
- Do not cut wet hair! Your hair is longer and heavier when it’s wet and it’s longer and heavier than more than you might think. You might cut your bangs to what you think is the perfect length only to find they’re much too short when your hair dries. This is an incredibly common mistake. Avoid making it!
- Have a good hair clip ready! I don’t care if you use a regular hair clip or a hair claw (my personal preference) but whatever you use, make sure it’s going to actually hold your hair back. You’re going to need to pin back all of the hair you aren’t cutting to reduce the chances of accidents.
- Do not – do not!! – cut bangs straight across! You will make a complete mess that will take you far longer to clean up than necessary. Stick with the method I’m about to offer. You’ll save yourself a whole lot of time and effort
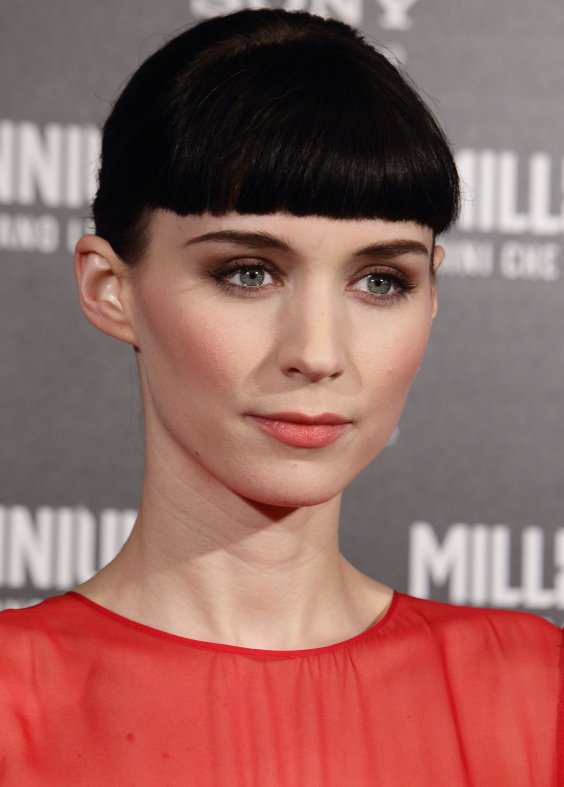 Rooney Mara (source: zimbio.com)
Okay, now that we have that out of the way, it’s time to tell you all how to cut bangs.
Step One: Style your hair like you would if you would for any typical day. You might have a style in mind for your bangs but it’s always a good idea to make sure the cut you have in mind will work with your normal every say style. Picture how the bangs will look. If your hair is long enough, you can fold hair from the back of your head over the front and use it to simulate bangs. Play around with the length until you get to a length you like.
Step Two: Comb your hair so the front of your hair is hanging in your face. Make sure you eliminate the part. Pay attention to how your hair naturally falls. This will give you an idea of where you should be cutting and how the bangs will fall once they’re cut. Choose the section of hair you want to turn into bangs. Remember, the further back on your head that section of hair is rooted, the longer your bangs will appear. If you just want wisps of bangs instead of blunter bangs, you’re going to want to use a smaller section of hair. Just a note here: it’s much better to start out with a smaller section and then cut more than it is to cut too much. Keep this in mind when you’re choosing the section.
Step Three: Separate your hair into two sections – the hair you’d like to cut into bangs and everything else. If there are any loose fringe pieces, decide what you’d like to do with them. Want them to be part of your bangs? Leave them loose, if not, put them with the ‘everything else’ hair. Put the ‘everything else hair back into a tight ponytail, twist it and secure it to the back of your head with your hair clip or hair claw.
Step Four: Gather the section of hair for bangs to the center of your face. You absolutely, positively must make sure the section is centered. If the section is not centered, you’re going to wind up with lopsided bangs – fine if that’s what you’re going for but a serious pain in the backside if it’s not.
Step Five: You are going to want to allow a little extra length for your bangs when you make the initial cut. This allows you room to correct mistakes and allows you to decide whether or not you want to take them a bit higher or leave them a bit longer. To allow for that extra breathing room, twist the hair a few times. How many times you twist is really up to you. I personally don’t count but I’d say no fewer than three times and no more than six.
Step Six: Hold your hair securely and use one snip of your scissors or shears to make the cut. Because you’re twisted the hair, the sides are going to be longer than the center. I prefer my bangs a little longer on the side but if you would prefer them to be straight across, it’ll only require a few snips from the scissors.
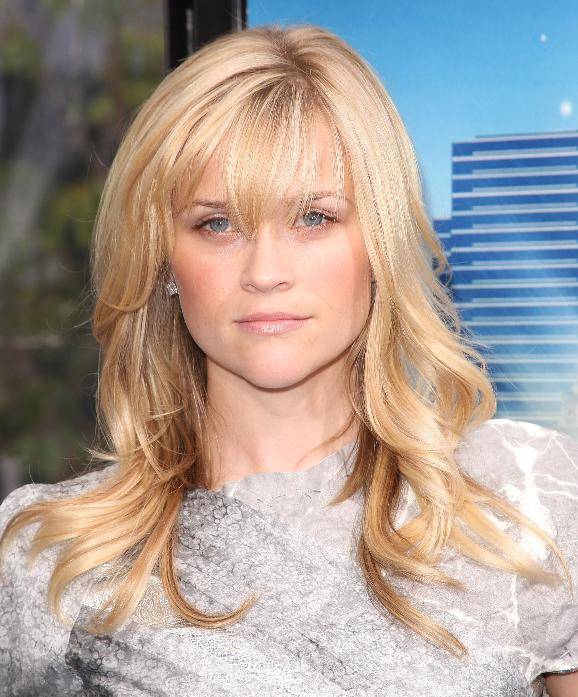 Reese Witherspoon (source: beauty.about.com)
Trimming Bangs
So now you know how to cut bangs. Pretty easy, right? Now you might want to know how to trim bangs to keep them looking nice. It’s even easier and starts off much the same way.
Step One: Style your hair as you usually would.
Step Two: Separate your bangs from the rest of your hair and pin or clip the rest of your hair back like you did when you cut your bangs.
Step Three: Run a dampened comb through your bangs. While this will weight your bangs down, you already have them basically at the length you want and you’re just giving them a quick trim to the extra length isn’t really a problem this time.
Step Four: Clip your bangs until you’re satisfied with how they look. Don’t trim any more than 1/4 of an inch though. Anything more than that is really more of a cut than a trim.


